Wednesday, October 31, 2007

Just One More


I know I don't usually bombard you with pictures of my kids, but I haven't had time to scrapbook anything so I thought I could at least show them off here.
Last night Steve and I decided to take the kids Christmas pictures. He got the lights and the backdrop all set up while I got the kids dressed. We always think that this is going to be quick and painless, and it never is. We took pictures for about an hour and this might be my favorite one. Do you think I could send this as a Christmas card with the caption "When will Christmas be here?"

Happy Halloween


Last February my kids decided what they wanted to be for Halloween, a two headed robot. I really thought that sometime between February and October they would change their mind. But they didn't. The whole family had fun working on this costume and naming the robot. On the front is a gauge that says "Trick-o-treat-o-Meter" Emma can turn the red needle from inside the box. We went to our neighborhood Halloween festival and the kids entered the costume contest and parade. They one 3rd place for funniest costume. They were so excited. I really do love Halloween Costumes made out of boxes.

I'm home again


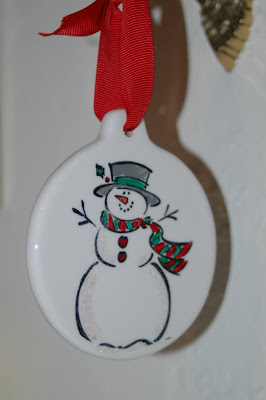
As most of you know I've been working temporarily at my kids school as the secretary. Well I'm done and back home. I feel like I've neglected a lot of things while I was working, the house, laundry and especially Stampin' Up!! Yesterday was my first day home and I spent the day cleaning, do laundry and going to the grocery. So today I decided to play a little. I made some Christmas ornaments. I hope you like them. The two paper ones I will post directions for the Fifth week of Christmas project. I hope to do that later today. The class ball in the front was fun to make. You stamp on a piece of acetate with stazon, and color it in with sharpies. I added some glitter too, then you roll it up and insert it into the clear ball. The snowman ornament in the back is stamped onto a porcelain ornament that you buy plain at Michael's, stamped with stazon and colored with sharpies.


Monday, October 29, 2007

The Fourth Week of Christmas--a little late

This week the card couldn't be easier. It is using the Snowflake stamp set and the Holiday Glitz card kit. This kit has everything pre-cut for 15 cards, it includes all the cardstock and accessories that you need. I love it when Stampin' UP! takes the work out of making cards!!

Supply list
Stamp Set:Snow Fall
Ink: Real Red, Wild Wasabi, and Soft Sky Classic Ink
Cardstock and Accessories: Holiday Glitz Card Kit

The Card kit is $24.95 when you purchase the Snow Fall stamp set. If you order anything off the supply list between today and November 5th it will be an additional 20% off.

Wow--Wishing you Cheer stamp set is 20% off until November 3rd!!


You may have seen some of the online promotions that Stampin' UP! is currently running. One of the great perks of this campaign is that Stampin' UP is offering a 20% discount on this very cute Christmas stamp set called "Wishing You Cheer". This offer is only good until November 3rd--so contact me soon.

Thursday, October 18, 2007

Altered Clipboards


Here is a couple of clipboard that I made using simply scrappin' kits. I love these kits. I very rarely use them for scrapbooks but love them for notebooks and cards and even clipboards. The top picture uses "primary colors" and the bottom use the level one hostess set "creative license". I think these would make great teacher gifts. But I need your opinion Steve says that it looks good but it isn't practical. He would prefer a small notepad on top (but bigger than a post-it) and the cork to go all the way across the bottom. Tell me what you think--should I make another sample?
Sorry about the last post. I'm still learning some of the formating for the blog. But on the bright side the pictures good.

12 Weeks of Christmas--Week 3


This weeks project uses some of my favorite products. . .wide grosgrain ribbon and dashing paper. You will see me using these two products on a lot of Christmas cards this year.
1. Stamp image onto whisper white cardstock and color in using markers or blender pen and ink.
2. Mount whisper white onto real red cardstock,pierce real red paper and mount onto old olive card.
3. Adhere strip of dashing paper to the bottom of the card and tie ribbon to complete card.
4. Use a marker to ink the "holidays" of the rubber stamp and stamp the envelope.
Supply List
Stamps: Big on Christmas
Ink: Basic Black, Old Olive, River Rock, Summer Sun, Real Red
Paper: Old Olive Cardstock, Real Red Cardstock, Whisper Cardstock, Dashing Designer Paper.
Accessories: Wide Grosgrain ribbon, Paper Piercer.
All products on the supply list will be 10% off until October 25th

Wednesday, October 10, 2007

Where do I get my ideas??


Everyone always asks where I get my ideas--well here's my little secret. I COPY!!! I see something I like and then I make it my own. I copy from my fellow stampers that I swap with, I copy from some of my customers and I copy from samples on splitcoaststampers.com. But my single greatest resource for ideas is Stampin' UP!! One of the great perks of being a demonstrator is that we get a monthly magazine that has great samples and instructions. One of my favorite parts of the magazine is the "A la Card" Template. We are shown several different cards using just one layout template. This really helps me when I'm planing workshops because sometimes I feel like my cards all start looking the same. I encourage you to copy anything you see here exactly like I have it our just use the template and change the colors and stamp set and make it your own.


Here are two samples using the same template. Try this template yourself.

On the Second Week of Christmas. . .


My true love gave to me The City of David Stamp Set.


I know I'm pretty crazy but ever since I started planning the 12 weeks of Christmas I've been singing that song in my head. I'm sure that it doesn't help that I've been listening to Christmas music since mid September.


Anyway here is week two's project. You will notice a trend with any Christmas cards that I post. They are very simple and reproducible. Christmas cards are different than any other card I make because I make Christmas cards in mass quantities. I typically send out about 100 Christmas cards. I would go insane if I had to make 100 of the same card so I typically make four different designs; two that are Christ-centered, one that is fun, and one that is a winter card.

I hope you like the City of David Card, City of David is one of my favorite Christmas stamps because it is so easy to use and it has a great sentiment with it. "It was a simple gift of love that changed the course of the world" is one of the sentiments (not used on this sample) in the set and I love it. How true that this simple gift changed everything. There is another sample card using this stamp set in a post about a Christmas Stamp-a-Stack. In that sample I used watercolor crayons on the image and it's a beautiful one layer card.

Supply list
Stamp Set: City of David
Paper: Night of Navy Cardstock, Brushed Silver Cardstock
Ink: Night of Navy Craft Ink
Accessories: Silver Cord


1. Stamp image and sentiment onto silver cardstock using navy craft ink. This will take a minute to dry.
2. Adhere silver cardstock to navy cardstock.
3. Tie silver cord around card and your finished.

Reminder: All products on the Supply list will be 10% until Wedneday October 17th.

Saturday, October 6, 2007

12 Days of Christmas-- Week 1


It's a little late but here it is.
Solemn Stillness Card


Stamp Set: Solemn Stillness

Paper: Mellow Moss Cardstock, Whisper White Cardstock, Brushed Gold

Ink: Encore Gold, Mellow Moss Classic

Accessories: Mellow Moss Grosgrain, Gold Cord, Gold embossing powder, Heat Gun, Embossing buddy, Powder Pal.
Instructions:
1. Stamp tree image on white cardstock using mellow moss ink. Then stamp garland image on top using gold ink, sprinkle with gold embossing powder and tap extra off into the powder pal. Heat with heat gun.
2. Adhere white cardstock to gold cardstock. Stamp stars in mellow moss onto mellow moss cardstock. Adhere gold cardstock to mellow moss cardstock.
3. Stamp sentiment at the bottom of mellow moss cardstock in gold.
4. Tie ribbon and cord around the card to finish.
Remember you can get any of the items off the supply list at 10% off until Friday October 12th.
Look for the 2nd week of Christmas to be posted Wednesday Oct 10th.

12 Weeks of Christmas

Each week between now and Christmas I will be posting a sample project on the blog. I will include the supply list and instructions on how to make the project. The projects will include cards, gift ideas and packaging and tags. I hope that you will be inspired by these projects to make some things for Christmas. I know that it can be a very busy season so get started on your cards and gifts now!!. As an additional bonus I will be offering everything on the supply list at 10% off that week, but you must mention the 12 Days of Christmas special when you place your order. If you have questions please call or email.