Friday, November 26, 2010
Thursday, November 25, 2010

Wednesday, November 24, 2010

Tuesday, November 23, 2010


Monday, November 22, 2010
Online Spectacular!!!


Friday, November 19, 2010
a little more bling...

Thursday, November 18, 2010
Is there such thing as too much bling?

Wednesday, November 17, 2010
Something I learned last year...

Tuesday, November 16, 2010

Monday, November 15, 2010

Friday, November 12, 2010

Wednesday, November 10, 2010

Tuesday, November 9, 2010

Sunday, November 7, 2010

Back Again...

Saturday, October 23, 2010
All Day Crafting and Scrapbooking!!
Saturday November 6th
9am to 9pm
Irvington Presbyterian Church
Cost is $25 (includes lunch and dinner)
Bring your own supplies to work on. This is a great time to work on scrapbooks, make Christmas cards, or get a jump start on holiday gifts!!
RSVP by October 30th!
Thursday, October 7, 2010
snowflakes into wreaths

Tuesday, October 5, 2010
I love embossing folders

Monday, October 4, 2010
Christmas card reworked

Saturday, October 2, 2010
Happy World Card Making Day
Did you know that cardmaking is so important that it has it's own holiday? Well it does and it's today. I encourage you to take a moment and make a card for someone (and don't forget to send it). The joy of giving cards is what hooked me to this craft!!
 |
| Here's one of the cards we made at the Christmas Card stamp-a-stack. |
Friday, September 17, 2010
First Christmas Card Stamp-a-stack

Christmas Card Stamp-a-Stack
Monday Sept 20th at 6:30pm
my house
Cost is $15
You will make 12 Christmas cards...all supplies included.
RSVP by noon on Monday
Friday, September 10, 2010
Halloween Milk carton, with different focal point

I used the stamp set from the mini catalog that has 4 sayings...Halloween, Thanksgiving, Christmas and Valentines Day!
To get a sampling of Holiday crafts come to my class on Wednesday at 6:30. We will cover all 4 of those holidays. Cost is $15 and you must pre registers.
Thursday, September 9, 2010
Halloween Sweet Treat Cup
 |
| Tangerine Tango, Elegant Eggplant Teeny Tiny Wishes stamp set Spiderweb embossing folder, White craft ink |
Wednesday, September 8, 2010
Halloween Mini MIlk Carton...as seen on TV
 |
| Tangerine Tango, Old Olive and Elegant Eggplant Sweet Centers stamp set |
- Cut Tangerine Tango Cardstock using Big Shot and milk carton die. Then fold all score lines.
- Apply adhesive to the tab and attach to the inside of box. Apply adhesive to Old Olive satin ribbon and wrap around the box.
- Apply adhesive to the bottom flaps of the box and fold in. Fill box with candy of your choice. Close the top of the milk carton with a staple or brad. Be careful to only close one end so the other can open to pour out the goodies.
- Using markers apply ink directly to the rubber stamp. After all colors have been applied gently huff on the stamp and stamp onto Whisper White card stock.
- Punch the stamped image out using a 1 1/4 inch circle punch, punch tangerine tango cardstock using 1 3/8 inch circle punch, punch elegant eggplant cardstock using the scalloped circle punch. Adhere these together and attach to the milk carton using dimensional adhesive.
- Give to someone you love!
Monday, September 6, 2010
An old watercolor technique revisited

- Cut the watercolor paper in half. Using watercolor crayons lightly color the entire piece of paper starting with the darkest color first.
- Use aqua painter or paint brush to paint water on to the paper. Work the water into the crayon until it is the desired lightness.
- Set the paper aside to dry while you work on the other parts of your card. You can also use your heat gun to dry the paper.
- When paper is completely dry stamp line image on top of the water colored paper using a dark ink such chocolate chip or early espresso (as used here).
Friday, September 3, 2010
Simple card from a workshop make and take

Thursday, September 2, 2010
Sometimes the paper is so pretty that's all you need

Wednesday, September 1, 2010
Sept 1st brings exciting stuff!!
Today is the day you can order from the holiday mini! Nope it's not too early to start thinking about Halloween, Thanksgiving or even Christmas. It's time to start planning, and you are going to have a great time making projects with some of the great new products in the Holiday Mini. A few of my favorites are the spider web embossing folder, beautiful holiday buttons, Autumn spice designer series paper, sound cards, fabric...oh there's just too much to list. So take a look for your self!

The other great thing about September 1st is that it is the first day for the new Recruiting promotion. Stampin' UP! is giving away this great craft tote to all new recruits from now until October15th. Stampin' Up designed this great tote for stampers...my favorite thing, besides the color and pattern, is that it is designed to fit my 12 inch paper trimmer. I've had several craft tote...none that fit my paper trimmer, or at least very well.

To learn more click on the picture above or just give me a call!
Tuesday, August 31, 2010
Last day for summer mini order!!

This was one of my favorite cards made this summer. I love the ice cream...it just feels so summer. It's not too late to order the the stamp set...get it today before it's retired!
We will also be making this card tonight at the Stamp-a-stack.
Monday, August 30, 2010
Not just for 4th of July

This is a card we will be making at the Stamp-a-Stack Tuesday. There's still time to register.
Stamp-a-stack tomorrow...not too late to RSVP
Summer Stamp-a-stack
Tuesday August 31st
6:30pm-8:30pm
Make 12 cards for $15
All supplies included. Just come stamp and have a good time.
Thursday, August 26, 2010
To crop or not to crop?

I was recently going through some old pictures. As I was looking at them I realized that what I enjoyed looking at was more than the people in the photo, it was also the background.
This picture of me sitting on my dad's lap is a perfect example. When I saw it I immediately was drawn to the kitchen I grew up in. I scanned the shelves in the cabinet noticing the Tupperware tumblers that we drank out of, the beautiful blue glass jars lining the counter (that I wasn't allowed to play with). And of course the Wonder Woman place mat...all great memories.
So what's my point? Simple. If this were a picture of my daughter sitting on my husbands lap that I was getting ready to scrapbook, I would crop out everything but the people. I would pay no attention to what at that moment is simply a messy background. But to those viewing the photo 30 years later, the messy background is just a fun to look at and brings back just as many memories as the people in the photo.
My answer to the scrapbooker's question of to crop or not to crop is....NOT to crop. At least don't crop them all! One day your child will look at your scrapbook and say something as silly as "I loved that place mat." And isn't that the purpose of scrapbooks...documenting our life to spark the great memories later?
Monday, August 23, 2010
individual shots of watercolor kids
 |
| ok, so you've seen this one before. |
 |
| Isn't she cute with her bright orange dress and her handmade valentine...I love her. I also love that this card uses the square scallop die that is in the Holiday Mini (it might be my new favorite) |
 |
| off to school...how sweet, do you think he's carrying her books? I love this pattern of the prints designer paper. I think it gives a great old fashion feel that really works with this stamp set. |
 |
| Love this...these images fit perfectly into this square and it really makes the focal image pop. As I was coloring the image I thought...I want purple tights :) You have until August 31st to order this great kit...contact me today!! |
Friday, August 20, 2010
Watercolor Card Kit

I'm offering the Watercolor card kit using the new Greeting Card Kids stamp set until August 31st.
Kit cost $15 and includes paper and accessories to make 8 cards and directions.
What you need to complete these cards are: stamp set, stazon ink in black or brown, aqua pen or paint brush, ink pads (pumpkin pie, real red, rich razzleberry, old olive)
With this kit you get to play with so many fun new things, the stamp set, brights buttons, brights brads, brights designer paper, water color paper! It's a great deal.
If you need it shipped please add $5 for shipping.
Thursday, August 19, 2010
Celebrate Summer with a Stamp-a-stack
So everyone is lamenting the end of summer because school has started...but it's not over yet people!!!
To Celebrate what is left of summer I'm having a Summer Stamp-a-Stack!
We will make 12 cards using products from the Summer mini, this will be the last chance to order the products from the Summer Mini catalog...so don't miss it!
Summer Stamp-a-Stack
August 31st at 6:30
My house
Cost is $15 if you prepay...$18 the night of the event.
Tuesday, August 17, 2010
gratitude...a sneak peak
 There are several things on this card from the new holiday mini that will be available September 1st. The stamp set is beautiful. The coordinating designer paper is wow!! It's actually the weight of card stock and has texture as well as the design. As you can see for this card I used the designer paper as the focal point of the card.
And last but not least the square scalloped die for the big shot...I'm in love!
Monday, August 16, 2010
I got some new stuff...

When I first looked at the catalog this stamp set jumped out at me. It's
called greeting card kids. I love it. I used the aqua pen and the ink pads to water color it...I still need practice doing that. The pumpkin polka dot paper is from the brights prints stack of paper and the button is from the brights button collection. I was never a big fan of the brights collection before the color renovation, but now it's one of my favorites!!!
Oh and the sentiment is a sneak peak from the Holiday mini....check tomorrow for another sneak peak.
Friday, August 13, 2010
Ever have a card you don't love....

Then you add this and change that ... then you love it!!! That's how I was with this card. I'm pretty happy with the end result.
Thursday, August 12, 2010
Butterfly, fly away

A little more bling on this butterfly...love it! I used the paper piercer to free hand a design to look like it was flying. The background was a little plain so I used the elegant lines embossing folder. It has the same fluttery feel that the embossing on the butterfly has.
Wednesday, August 11, 2010
Today's seems very funeralish
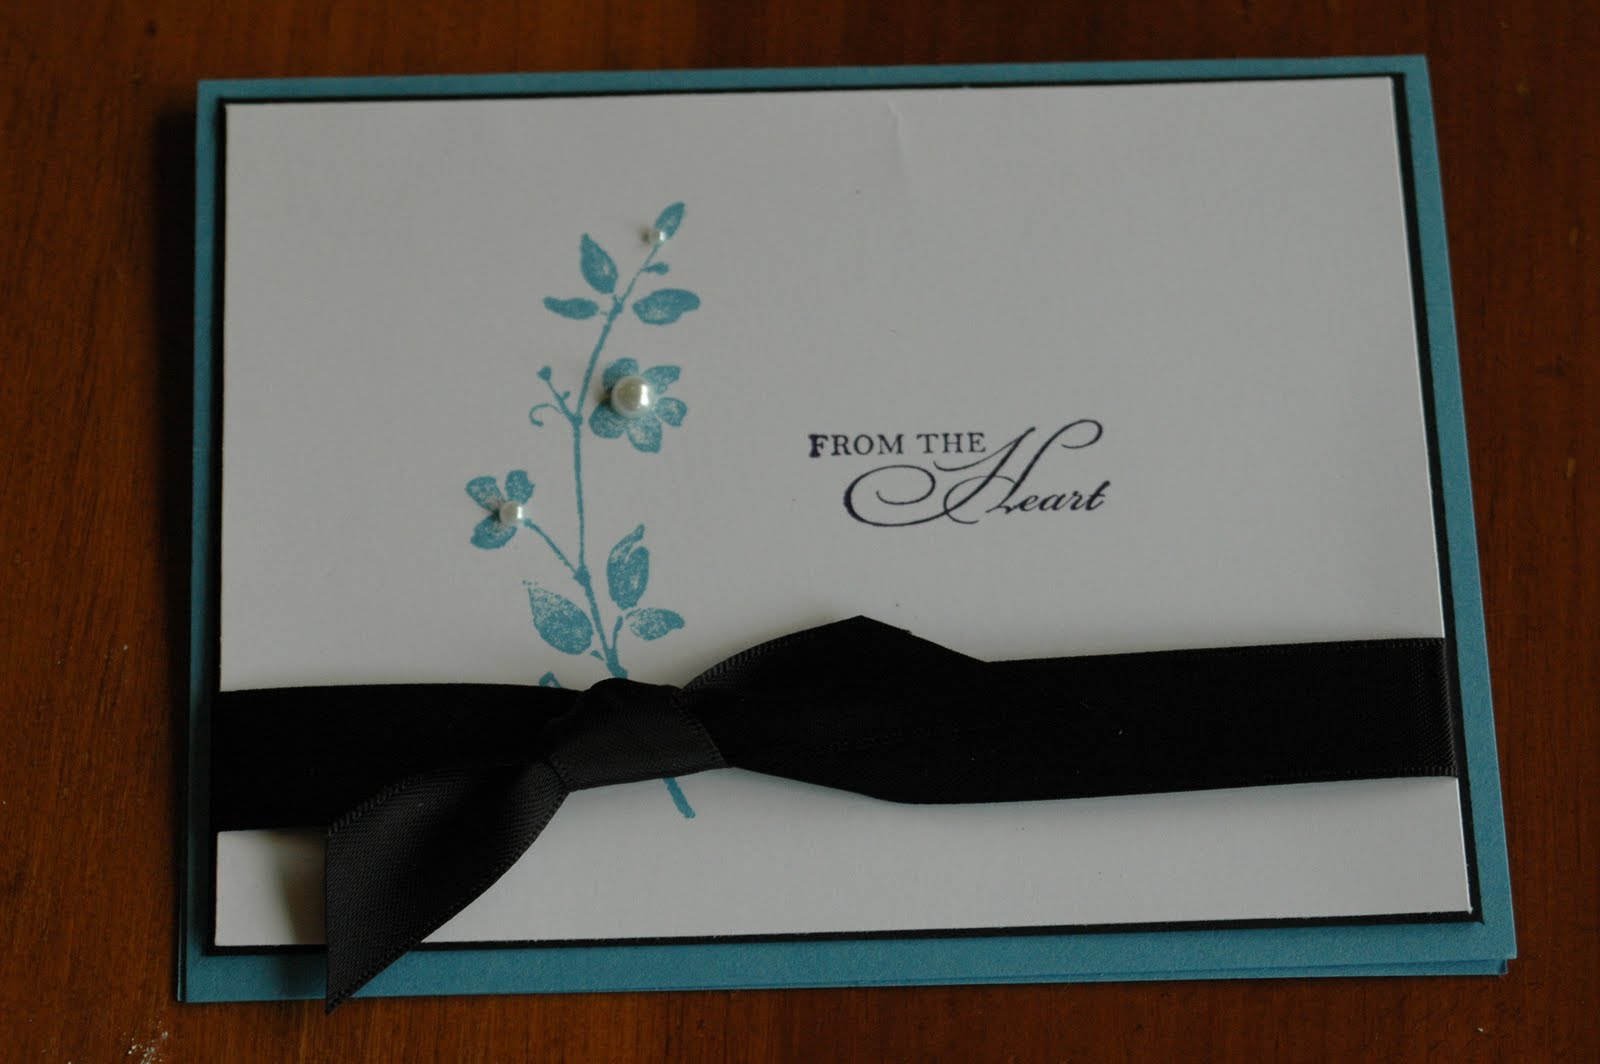
I think the card is beautiful, but with the black and the pearls is makes me think of a funeral. This card is so simple, but the elegant ribbon and the adhesive pearls really make this card go from blah to wow. Have I told you how much I love the self adhesive rhinestones and pearls...LOVE THEM!!
Tuesday, August 10, 2010
Wedding Thank You

It's not really but that's what it makes me think of. I love the texture of the wallpaper embossing folder with the black satin ribbon...wow! The cardstock is rose red and pink pirouette.
Monday, August 9, 2010
a little faux stitching

This flower is from apple blossom level two stamp set. I used the same flower for the background as I did for the focal point. Added some faux stitching (free hand paper piercing then use white gel pen to make the stitching). I thought it needed a little something else so I added a few paper buttons with twine and bling!!
I love the self adhesive rhinestones. I would say that so far they are my most favorite thing in the new catalog...what's yours?
Friday, August 6, 2010
Printed Petals

I love this flower from the Printed Petals stamp set...it's so easy to cut out!! I used a build a brad for the center but you could easily use a circle punch, or button. so cute!!

Thursday, August 5, 2010
My first stamp set out of the new catalog


had to be "Morning Cup" I've been waiting for a new coffee/tea stamp set since they retired "like it a latte". The sentiments in this set are great "a morning without coffee is like sleep" How true!!
You should also know that this is my first clear mount set. Yes you heard correct I have made the switch to acrylic blocks and clear mount stamp sets. Why would someone who claimed just a month ago that she would never switch, switch?
- You can see what you are stamping and where you are stamping.
- They are so much easier to store
- They are CHEAPER!!!
- Stampin' UP! is now selling a very cool case to hold your acrylic blocks.
But I knew most of that before, what sold me was when I used them at a fellow demonstrator's house. I was wowed by how easy they were. Now I'm still not sure how I'm going to work some of my stamp-a-stacks. I"m worried I won't have enough blocks but I'll figure that out soon enough.
The moral of this story is if you are thinking about whether you want something or not, or if you'd like it...play with someone else's before you make your decision.
Subscribe to:
Posts (Atom)