Wednesday, December 12, 2007

January Promotion

Stampin' Up! had two great promotions for January. One for the hostess and one for customers. For customers there is a bundle, including a new valentine's day stamp set, celophane bag and two spools of ribbon (one spool is free). January hostesses that hold a workshop with $350 or more in sales will get to pick any stamp set out of the preview catalog for FREE!! For more info click here http://www.stampinup.com/us/documents/US_Valentines_Bundle_0108.pdf

Book your January Workshop Now!!

Thursday, November 29, 2007

Wrapping up the Holidays

Stampin' up! has just released a new promotion that is all about helping you with the wrapping portion of your holidays. Click on the link below to see the flyer.

http://www.stampinup.com/us/documents/US_Wrapping_Flyer_1107.pdf

This promotion includes buy one get one free 15/16" satin ribbon, 20% of the Tags for All Stamp Set.

112409
Holiday Tag Bundle
$4.95

110380
Tags for All Stamp Set* (20% off)
$24.76

110264
Designer Gift cards* (30% off)
$4.55

109862
Chocolate Chip satin ribbon*
Buy 1, get 1 free!**

109863
Purely Pomegranate satin ribbon*
Buy 1, get 1 free!**

112410
Tin 3-Pack
$9.95

110147
Celebration wrapping paper*
$17.95

110228
Hand Selected Accents & Elements (25% off)*
$8.21


Don't miss out on these great deals!!

Tuesday, November 20, 2007

Dates to Rember

There is a lot going on right now at Stampin' Up! and I wanted to let you know what is coming up so you can plan ahead.

November 23rd--Day after Thanksgiving Special
November 27th--Last Christmas Stamp-a-Stack
November 30th--Last day to order from the Holiday Mini
December 1st--Retirement list released
December 4th--Holiday Giftmaking Class
December 7th--Holiday Open House/Retirement Party
December 31st--Last day to order from the Fall/Winter Catalog
January 1st--New Spring/Summer Catalog on line
February 1st thru March 15th --Sale-A-Bration

There maybe more added to the list later but for now that gives you an idea of what to look for. If you want to hostess a workshop during Sale-A-bration you need to set the date with me as soon as possible, I'm already filling up.

The 8th? week of Christmas

I know I've missed a couple weeks of Christmas and now I've forgotten what week it is. Anyway this is a quick and easy and inexpensive gift. A Personalized Frame. This frame was bought at Hobby Lobby and I used paper from the "Out and About" Simply Scrappin kit. I added ribbon and hardware. I plan on putting a picture of one of our family camping trips in this frame.

Step one: Trace Frame onto patterned paper and cut out.
Step two: Adhere paper to frame using modge podge or anywhere glue stick. I use the anywhere glue stick because when I try to use modge podge my paper always bubbles.
Step Three: Sand off the access paper using a sanding block. This also give a distressed look to the paper.
Step Four: Embellish however you wish.

Supply List:
Designer Paper
AnyWhere Glue Stick
Hodgepodge Hardware
Ribbon
Sanding Blocks.

Anything on the supply list will be 20% off until November 28th but you must mention the 12 days of Christmas in your order.

A couple more samples


Here are two other cards that we made Friday night. The top one uses the Snow Wheel from the Holiday mini. I used white craft ink on night of navy cardstock. That is layered on top of vellum cardstock. I really like the way vellum gives that soft white look. Then I thought there needed to be a focal point . I wish I had the snowflake punch I would have punched a vellum snowflake, but instead I stamped a snowflake and layered on top of a vellum scalloped circle punch. It gives the same feel. This would be a great card to make in mass production. The wheels make stamping go so fast!!
The bottom picture is a card using the "So Much" stamp set that I received at the regional training seminar. I haven't used it very much, but I really like it. I like to use it with the coluzzle (my new favorite toy). I used only Purely Pomegranate ink. I stamped the flower and cut it out. I don't really like to take the time to cut things out but this is an easy flower to cut. Of course you have to add a little bling to the center of the flower using the rhinestone brads. Then I used the coluzzle to cut the circle.

Free Stamp Set


Stampin' UP! Demonstrators love free stamps just as much as everyone else. And last week I got a great surprise in the mail. A free stamp set called "Time Well Spent". It will be in the new catalog coming January 1st. The set is a level three hostess set. All active demonstrators received this set free as a Thank you for Stampin UP!. It really is a great company to work for.
I couldn't wait to use this set, so we made this card at a party Friday night. It uses the sentiment only of the 12 piece set. I used markers to color in the letters of of the word "Friends" then I used color blocks in Old Olive, Really Rust and Chocolate Chip behind the main image. It's a very cute but simple card.


Saturday, November 17, 2007

Spring/Summer Preview Catalog

I know it's been awhile since I've posted anything, but I think this Post will make up for it. Check out the new Spring/Summer Preview Catalog by clicking the link below.

http://www.stampinup.com/us/documents/SSCPreview_08_US.pdf

There's extra benifits for the January Hostess!!, Beautiful paper, a new punch, even a new product for Stampin' UP--rub-on's.

I'd love to hear what you think of the products in the Preview--go ahead and post a comment.

Thursday, November 1, 2007

Get a Jump on your Jingle Class


Okay, this class is really a way to get you thinking about Christmas and a little more organized. We will be making a Christmas Organizer that has 4 pockets. For mine I have one pocket for Caleb and one for Emma. This helps me keep track of receipts, how much I've spent and how many gifts they each have. Like all crazy moms I try to have approx. the same number of gifts to open as well has having spent approx. the same amount of money. This can be a very difficult task, I've been know to open a box and wrap pieces separately.
My organizer also has a place for my list of what to buy and what to make. Because I make so many of our gifts, I sometimes don't realize how many I have left to make if I don't create a separate list for that. You might choose to make your organizer a little different with a spot for recipes, cards to send or what ever works for you and will help you get through the holidays a little easier.

To give you a jump start on gifts for the holidays we are also going to make a very nice gift with matching gift box. This is a silk scarf stamped with our snow fake spot stamp set. We will even make an easy box that matches the scarf. This same box design can be used for any type of small gift--even note cards (which is one of my favorite gifts to give).

DATE: November 6th at 7pm
Cost: $20

I've got supplies for four people but I need RSVP's by Saturday Nov 3rd.

5th Week of Christmas


The scalloped ornament is very simple to make--and you can even use up some of your scraps. you know I'm all about using up that scrap basket.

Step 1: Punch 10 scallop circles out of designer paper (you can use cardstock that you've stamped on as well)

Step 2: Fold each circle in half making sure to fold each circle the same way.

Step 3: Adhere the the circles together, all except one.

Step 4: Use cord to create the loop, add beads or pearls from the pretties kit.

Step 5: Adhere the last of the circles together around the cord.


This ornament is simply a paper lantern. I made it very quickly at the October Hostess Club just to give another idea of ornaments you could make using paper. I also saw a very cute example of this lantern using the apple cider paper and made it into a pumpkin--very cute.

Step one: Cut 10 strips of 1" by 6" paper.

Step two: Punch a hole in the top and bottom of each strip. If you have the crop-a-dile it will punch through all ten sheets at once. I do not so this was the most time consuming part of the project.

Step three: String the ribbon through the holes and tie a knot on the top and bottom to make sure it doesn't slip.


Supply List:

Designer Series Paper
Cord
Pretties Kit
Crop-a-Dile
Scalloped Circle Punch

All supply list items will be 20% until November 7th. Don't forget to mention the 12 Days of Christmas when you order.

If you have any questions about making the ornaments you can always call or email me. They really are pretty simple, but writing the directions makes them sound a little more complicated.

Wednesday, October 31, 2007

Just One More


I know I don't usually bombard you with pictures of my kids, but I haven't had time to scrapbook anything so I thought I could at least show them off here.
Last night Steve and I decided to take the kids Christmas pictures. He got the lights and the backdrop all set up while I got the kids dressed. We always think that this is going to be quick and painless, and it never is. We took pictures for about an hour and this might be my favorite one. Do you think I could send this as a Christmas card with the caption "When will Christmas be here?"

Happy Halloween


Last February my kids decided what they wanted to be for Halloween, a two headed robot. I really thought that sometime between February and October they would change their mind. But they didn't. The whole family had fun working on this costume and naming the robot. On the front is a gauge that says "Trick-o-treat-o-Meter" Emma can turn the red needle from inside the box. We went to our neighborhood Halloween festival and the kids entered the costume contest and parade. They one 3rd place for funniest costume. They were so excited. I really do love Halloween Costumes made out of boxes.

I'm home again


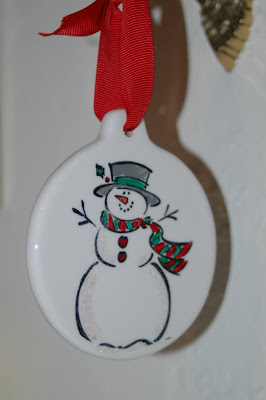
As most of you know I've been working temporarily at my kids school as the secretary. Well I'm done and back home. I feel like I've neglected a lot of things while I was working, the house, laundry and especially Stampin' Up!! Yesterday was my first day home and I spent the day cleaning, do laundry and going to the grocery. So today I decided to play a little. I made some Christmas ornaments. I hope you like them. The two paper ones I will post directions for the Fifth week of Christmas project. I hope to do that later today. The class ball in the front was fun to make. You stamp on a piece of acetate with stazon, and color it in with sharpies. I added some glitter too, then you roll it up and insert it into the clear ball. The snowman ornament in the back is stamped onto a porcelain ornament that you buy plain at Michael's, stamped with stazon and colored with sharpies.


Monday, October 29, 2007

The Fourth Week of Christmas--a little late

This week the card couldn't be easier. It is using the Snowflake stamp set and the Holiday Glitz card kit. This kit has everything pre-cut for 15 cards, it includes all the cardstock and accessories that you need. I love it when Stampin' UP! takes the work out of making cards!!

Supply list
Stamp Set:Snow Fall
Ink: Real Red, Wild Wasabi, and Soft Sky Classic Ink
Cardstock and Accessories: Holiday Glitz Card Kit

The Card kit is $24.95 when you purchase the Snow Fall stamp set. If you order anything off the supply list between today and November 5th it will be an additional 20% off.

Wow--Wishing you Cheer stamp set is 20% off until November 3rd!!


You may have seen some of the online promotions that Stampin' UP! is currently running. One of the great perks of this campaign is that Stampin' UP is offering a 20% discount on this very cute Christmas stamp set called "Wishing You Cheer". This offer is only good until November 3rd--so contact me soon.

Thursday, October 18, 2007

Altered Clipboards


Here is a couple of clipboard that I made using simply scrappin' kits. I love these kits. I very rarely use them for scrapbooks but love them for notebooks and cards and even clipboards. The top picture uses "primary colors" and the bottom use the level one hostess set "creative license". I think these would make great teacher gifts. But I need your opinion Steve says that it looks good but it isn't practical. He would prefer a small notepad on top (but bigger than a post-it) and the cork to go all the way across the bottom. Tell me what you think--should I make another sample?
Sorry about the last post. I'm still learning some of the formating for the blog. But on the bright side the pictures good.

12 Weeks of Christmas--Week 3


This weeks project uses some of my favorite products. . .wide grosgrain ribbon and dashing paper. You will see me using these two products on a lot of Christmas cards this year.
1. Stamp image onto whisper white cardstock and color in using markers or blender pen and ink.
2. Mount whisper white onto real red cardstock,pierce real red paper and mount onto old olive card.
3. Adhere strip of dashing paper to the bottom of the card and tie ribbon to complete card.
4. Use a marker to ink the "holidays" of the rubber stamp and stamp the envelope.
Supply List
Stamps: Big on Christmas
Ink: Basic Black, Old Olive, River Rock, Summer Sun, Real Red
Paper: Old Olive Cardstock, Real Red Cardstock, Whisper Cardstock, Dashing Designer Paper.
Accessories: Wide Grosgrain ribbon, Paper Piercer.
All products on the supply list will be 10% off until October 25th

Wednesday, October 10, 2007

Where do I get my ideas??


Everyone always asks where I get my ideas--well here's my little secret. I COPY!!! I see something I like and then I make it my own. I copy from my fellow stampers that I swap with, I copy from some of my customers and I copy from samples on splitcoaststampers.com. But my single greatest resource for ideas is Stampin' UP!! One of the great perks of being a demonstrator is that we get a monthly magazine that has great samples and instructions. One of my favorite parts of the magazine is the "A la Card" Template. We are shown several different cards using just one layout template. This really helps me when I'm planing workshops because sometimes I feel like my cards all start looking the same. I encourage you to copy anything you see here exactly like I have it our just use the template and change the colors and stamp set and make it your own.


Here are two samples using the same template. Try this template yourself.

On the Second Week of Christmas. . .


My true love gave to me The City of David Stamp Set.


I know I'm pretty crazy but ever since I started planning the 12 weeks of Christmas I've been singing that song in my head. I'm sure that it doesn't help that I've been listening to Christmas music since mid September.


Anyway here is week two's project. You will notice a trend with any Christmas cards that I post. They are very simple and reproducible. Christmas cards are different than any other card I make because I make Christmas cards in mass quantities. I typically send out about 100 Christmas cards. I would go insane if I had to make 100 of the same card so I typically make four different designs; two that are Christ-centered, one that is fun, and one that is a winter card.

I hope you like the City of David Card, City of David is one of my favorite Christmas stamps because it is so easy to use and it has a great sentiment with it. "It was a simple gift of love that changed the course of the world" is one of the sentiments (not used on this sample) in the set and I love it. How true that this simple gift changed everything. There is another sample card using this stamp set in a post about a Christmas Stamp-a-Stack. In that sample I used watercolor crayons on the image and it's a beautiful one layer card.

Supply list
Stamp Set: City of David
Paper: Night of Navy Cardstock, Brushed Silver Cardstock
Ink: Night of Navy Craft Ink
Accessories: Silver Cord


1. Stamp image and sentiment onto silver cardstock using navy craft ink. This will take a minute to dry.
2. Adhere silver cardstock to navy cardstock.
3. Tie silver cord around card and your finished.

Reminder: All products on the Supply list will be 10% until Wedneday October 17th.

Saturday, October 6, 2007

12 Days of Christmas-- Week 1


It's a little late but here it is.
Solemn Stillness Card


Stamp Set: Solemn Stillness

Paper: Mellow Moss Cardstock, Whisper White Cardstock, Brushed Gold

Ink: Encore Gold, Mellow Moss Classic

Accessories: Mellow Moss Grosgrain, Gold Cord, Gold embossing powder, Heat Gun, Embossing buddy, Powder Pal.
Instructions:
1. Stamp tree image on white cardstock using mellow moss ink. Then stamp garland image on top using gold ink, sprinkle with gold embossing powder and tap extra off into the powder pal. Heat with heat gun.
2. Adhere white cardstock to gold cardstock. Stamp stars in mellow moss onto mellow moss cardstock. Adhere gold cardstock to mellow moss cardstock.
3. Stamp sentiment at the bottom of mellow moss cardstock in gold.
4. Tie ribbon and cord around the card to finish.
Remember you can get any of the items off the supply list at 10% off until Friday October 12th.
Look for the 2nd week of Christmas to be posted Wednesday Oct 10th.

12 Weeks of Christmas

Each week between now and Christmas I will be posting a sample project on the blog. I will include the supply list and instructions on how to make the project. The projects will include cards, gift ideas and packaging and tags. I hope that you will be inspired by these projects to make some things for Christmas. I know that it can be a very busy season so get started on your cards and gifts now!!. As an additional bonus I will be offering everything on the supply list at 10% off that week, but you must mention the 12 Days of Christmas special when you place your order. If you have questions please call or email.

Friday, September 28, 2007

My Computer Crashed

Yes, it happened to me. The thing we all think will never happen to us. My computer crashed and I lost everything. I'm trying not to stress too much. After all in the grand scheme of things this is a little thing. We are currently in the process of getting a new computer so I hope to have a newsletter out by the end of next week and new samples on the blog sometime next week.

Sunday, September 23, 2007

Simply Sent Kits 20% Off

October 4-8 Stampin' UP! is offering 20% off all Simply Sent Card kits. These kits are awesome, they include everything, yes, everything that you need to make cards including instructions. This is a great gift idea!! I need all orders by 5p October 8th.

To take a look at the different Kits take a look at the online catalog, here's the link:http://catalogs.shoplocal.com/stampinup/index.aspx?pagename=shopmain&fsid=d8bf2c5d-1226-47e6-87e7-e6404e6e5c38&storeid=1038724&circularid=10999

World Card Making Day


Saturday October 6th paper crafters around the world will be celebrating World Card Making Day. I love to make cards because it's fun, I love to make cards because it's relaxing. But I also love to make cards because I love to give cards. I think that most people appreciate the hand stamped cards. That is what this day is all about, making cards to share a little bit of happiness. Yes, I am a hopeless optimist. Yes I think sending someone a handstamped card CAN make the world a better place. So in honor of World Card Making Day I'm going to host a Stamp-a-Stack from 10am-noon on Saturday Oct 6th. For $10 you will make 8 cards, 4 your will keep and send to someone you love, 4 I will keep and send to soldiers that are serving overseas. This is a very small and easy way to say a big ThankYou!!. The cards will be a mix of thank you, thanksgiving and Christmas. This is a sample of one of the cards we will be making. My goal is to end 100 cards to soldiers overseas between now and Christmas. . .will you help??

Merry & Bright


I love the new little Merry and Bright Set. It's so cute and so versatile!! I don't always like small stamps because I don't know what to do with them but I love this set. And the snowman fits perfectly into the circle punch!!


I'm sure you will see these at one of the four Christmas Card stamp-a-stacks that I'm offering this season.


Snowman Card:

Stamp Set: Merry & Bright

Cardstock: Confetti, Certainly Celery, Real Red

Ink: Basic Black

Accessories: Blender Pen, 1 1/4 circle punch, 1 3/8 circle punch, scalloped circle punch, real red wide grosgrain ribbon.


Christmas Tree Card:

Stamp Set: Merry & Bright

Cardstock: Almost Amethyst, Confetti, Certainly Celery

Ink: Basic Black, Almost Amethyst

Accessories: Blender pen, Pretty in Pink Ribbon, rhinestone brads.

Thursday, September 13, 2007

Fall Stamp Camp

I have been really busy making samples for upcoming classes the last two days. I'm sorry to admit that I'm not usually this organized (I'm trying though). Usually the day before the class I look to see how many people are coming and frantically start making projects and cutting supplies. I'm trying to plan ahead more so that you can see what you will make at the class.

Here are some samples of what we will be making at the October Stamp Camp--it's a Fall Theme. We will be making a gratitude journal, coaster, decorated candy jar and one or two cards.


When:Tuesday October 9th 7p

Where: My house (email for directions)

Cost: $20 (read the fall frenzy article to find out how to attend this class for free)

RSVP by October 4th.

Fall Frenzy Promotion


Don't forget to take advantage of Stampin' UP!'s great September promotion. This is a great time to get ready for fall holidays. And in addition to to the 30% off, I will give you free admission to my Fall Stamp camp coming up on October 9th. When you call or email your order to me, just mention this additional perk. This special is only for my Blog readers!!


Fall Frenzy Promotion
Spend $30 in regular priced merchandise and qualify to purchase one of each of the six promotional stamp sets at 30 percent off!
Item Page # Description Discounted Price
105355 26 Bitty Boos Too $12.57
109284 29 Haunting Halloween $13.27
107383 30 Thoroughly Thankful $16.07
109373 108 Autumn Fest $16.77
109421 91 Elementary Essentials $19.57
110366 17 Stem Silhouettes* $22.37

Wednesday, September 12, 2007

School Days Scrapbook


I'm always excited to try new things, especially when stamping is involved. Well I'm trying something new on the business end of stamping. I've partnered with the Indy Parks Department to offer a 6 x 6 "School Days" Scrapbook class. I will be teaching the class October 3rd at 6:30pm at the Broadripple park. This is so exciting for me because it's a chance to meet new people. It also got me to do something I was really dreading, that is figure out a way to scrapbook the kids school years with out getting overwhelmed. For this project I decided to use the KISS method, Keep It Simple Stamper. I used the Primary Colors Simply Scrappin Kit and created a two page spread for each grade K-8. On one page will be for a 3 1/2 x 5 school picture, the other page will contain a journal card for teacher names, activities and friends. There will also be a journal card that simply says notes at the top so that you can choose to write anything you want. The scrapbook will be completed in one night, then as your child finishes each grade you can take time to reflect on the year and journal in this scrapbook. There will be room for expansion if you choose to add in the high school years later. I've included a picture of a sample two page spread, the full album is on display at the Broadripple Park.


If you would like to take this class you can call the Broadripple Park at 327-7099.


What: School Days Scrapbook

When: October 3rd 6:30

Where:Broadripple Park

Cost: $45 (this include all of the supplies including a 6x6 linen scrapbook)

Christmas Stamp-a-Stack


Hey Guys are you ready for Christmas? No? That's okay because I am, and I'm ready to help you. My first Christmas Card Stamp-a-Stack is coming up quick so make sure to RSVP to get your spot. I need all rsvps by September 20th. We will make 15 cards. Probably the ones in the picture--but I might change some of them a bit.


When: Tuesday September 25th 7-9pm

Where: My house (east side of Indy, call or email for directions)

Cost: $20


These cards use the following sets: Loads of Love, Snowflake spot, Snow, Star Studded, City of David and Merry and Bright.

Monday, September 10, 2007

Louisville Regional Seminar


I had the most awesome weekend. I attended a Stampin' Up! Regional Seminar is Louisville KY on Saturday. On learned so much and I can't wait to share it with all of you. Some of you may be wondering what exactly happens at a seminar like this. Well let me tell you that the fun starts in the car on the way down. I went with 5 other Stampin' Up! demonstrators. We shared class ideas, great gifts to give our hostesses, and even some organizational tips. Once at regionals--the swaps began. I made about 45 card fronts and 6 tile coasters to swap. we swap card fronts because the purpose is to get ideas not cards and it's a little cheaper and faster to make multiples. Some people made as many as 100 swaps. My swaps were gone before they even open the doors to the main room. I wish I would have brought more, but I got a lot of great ideas. Everybody makes cards and projects differently, so it's great to see what other people have done. Once inside the room we found a table and began putting together or free stamp set!! Yes I said free, all attendees received a stamp set called "So Much". I have to admit I didn't think much of this set when I saw it in the catalog--but now I'm in love. During the day we had classes on techniques, products (I've fallen in love with the Coluzzle and the crop-a-dile) class ideas (You'll be hearing more about a really cool holiday decor class) and business ideas. These classes are taught by both Stampin' Up! employees and some of the top demonstrators. It's really great to see what "real demonstrators" do in their workshops. Throughout the day we have the opportunity to make several projects using our new stamp set and another cool stamp set out of the Mini catalog called "True Friend". There are display boards all around the room full of cards and scrapbook pages. there were literally hundreds of ideas displayed. Thankfully my friends all brought their camera because I forgot mine. So I'll show pictures of displays later. Then the 6 of us went to dinner and rehashed everything we learned, breaking it down to figure out exactly how we could make it work for us. It was a great day--thank you Stampin' UP!

Thursday, September 6, 2007

Criss Cross Pocket Card


I'm just now starting to experiment with different folds for cards. I'm typically a pretty basic card maker, cut the cardstock in half, fold it in half and decorate. However I love these pocket cards. I especially love that you can really show off some of the great designer paper that stampin up offers.


Here are basic instructions:


Step One: Cut 81/2 x 11 cardstock at 4 1/4 inches


Step Two: score both pieces of cardstock at 5 1/2 inches


Step Three: (Here's the tricky part to explain) Cut each piece of cardstock at an angle from the scored corner to the outside corner.


Step Four:Glue the two pieces of cardstock together by layering the 4 1/2 x 5 1/2 sides of the cardstock together. This will create the back of the pocket .


Step Five: Fold the diagonal flap over each other adhering only at the bottom, this will create the top of the pocket.


Step Six: Create the note card inside (4 x 5 1/4 inches) and decorate as you wish.


If this doesn't make sense you are just going to have to come to the class on Tuesday and make one with me.

Just Like You Class


My new favorite stamp set is "Just like You". I seem to be going for it everytime I stamp. Which is why I decided to vote a whole class to just one stamp set. I even love the designer paper that matches--I really do love when things coordinate.


We will be making a notebook, gift box, a regular card or two and a cool criss cross pocket card.

When: Tuesday September 11th 7pm

Where:My House

Cost: $20

RSVP: By Friday Sept 7th.

Wednesday, September 5, 2007

When the leftovers are better than the original


On Saturday I will be attending a Stampin' UP! Regional Seminar. One of the best parts of any Stampin' Up! event is swaping cards with other demonstrators. So this week I've been working on my swaps, I designed two different cards and I made 20 or each design. Now in the world of swaps that's not a huge number. Some of the demonstrators that I'm going with are making 80! Anyway, I had some scraps laying on my table after I was done and decided there were enough scraps on the table for me to make one more if I altered the colors slightly. So I did, and I love the outcome. In fact I love the card with the leftovers more than I love the original design.


Stamps: Define Your Life, Big Deal Alphabet
Ink: Groovy Guava, Chocolate Chip
Paper: Chocolate Chip, Groovy Guava, Rose Red, Certain Celery, Whisper White
Accessories:Hodgepodge Hardware, Groovy Guava stitched ribbon
I'm still working on getting a good picture--be patient.

Tuesday, September 4, 2007

Are you ready for Fall?


Are you ready for Fall? I am. I sat around a campfire this weekend and it felt great. I have even picked up a few leaves that have fallen in my front yard. That is what inspired this card. the leaves are a Jumbo Stampin' Around Wheel "Leaves Awash". I used Old Olive ink on Sahara Sand cardstock. then I colored with Really Rust and More Mustard Watercolor Crayons. Then I blended the colors with a blender pen. The leaves are backed with Old Olive cardstock and mounted on Really Rust cardstock. Then I stamped "Thankful Thoughts" in Old Olive. The sentiment is from the "Thoroughly Thankful" stamp set, which is great for fall and is currently on sale. To learn more about the sale check out the Stampin' UP Website at www.stampinup.com

My First Post--Goals

Wow, I'm so excited. This is my first official post to my blog. Let me start by telling you what my goals are for the blog. I plan on updating weekly, adding new samples with directions on how t o make the project. A future goal is to have tutorials on the blog (but I don't what to gt ahead of myself). I will also post information on classes and specials offered by Stampin' Up! much like I do with the monthly newsletters. I believe that in this craft, imitation is truly the highest form of flattery, so please feel free to CASE (copy and share everything). When you want to stamp but have no ideas I hope you can come here to "Paper Inklings" and get an inkling of what you can do.